
Creating a jumpscare video for Stream To Earn
Create a short video with a transparent background, upload it in Stream To Earn, set it as an alert trigger, and make it interrupt the screen. Works on any Pro or Expert tier.
The full workflow
Eight steps from “I have an idea for a scare” to “the alert is live on stream”.
Generate the video
Use any AI video generator that can produce a short clip from text or an image — Gemini/Veo, Runway, Kling or whatever you already pay for. The only thing that really matters is that the generated video has a clean green-screen background.
- Duration: 2–5 seconds
- Format: MP4 is fine
- Background: flat bright green
- Subject: one clear character or object
- Motion: simple and readable
- Camera: simple movement or locked
- No text, logos, scenery, floor, shadows or detailed background
A scary creature stands in front of a perfectly flat bright green screen.
The background is evenly lit with no shadows, no floor, no objects, and no scenery.
The creature suddenly moves toward the camera in one short dramatic motion.
Short 4 second video, 16:9, clear subject, simple camera, no text, no logo.
Example prompt 2
A creepy mask-like face is centered in front of a clean bright green screen.
The face stays still for a moment, then quickly rushes close to the camera.
The green screen background stays flat and uniform.
Short 3 second clip, 16:9, no environment, no props, no text.
- Say “flat bright green screen”
- Say “evenly lit”
- Say “no shadows on the background”
- Keep the action simple
- Avoid complex scenes — they make background removal harder
- If the subject has green clothing, green skin or green glow, change it — Chroma key may remove those parts too
Remove the green background in CapCut
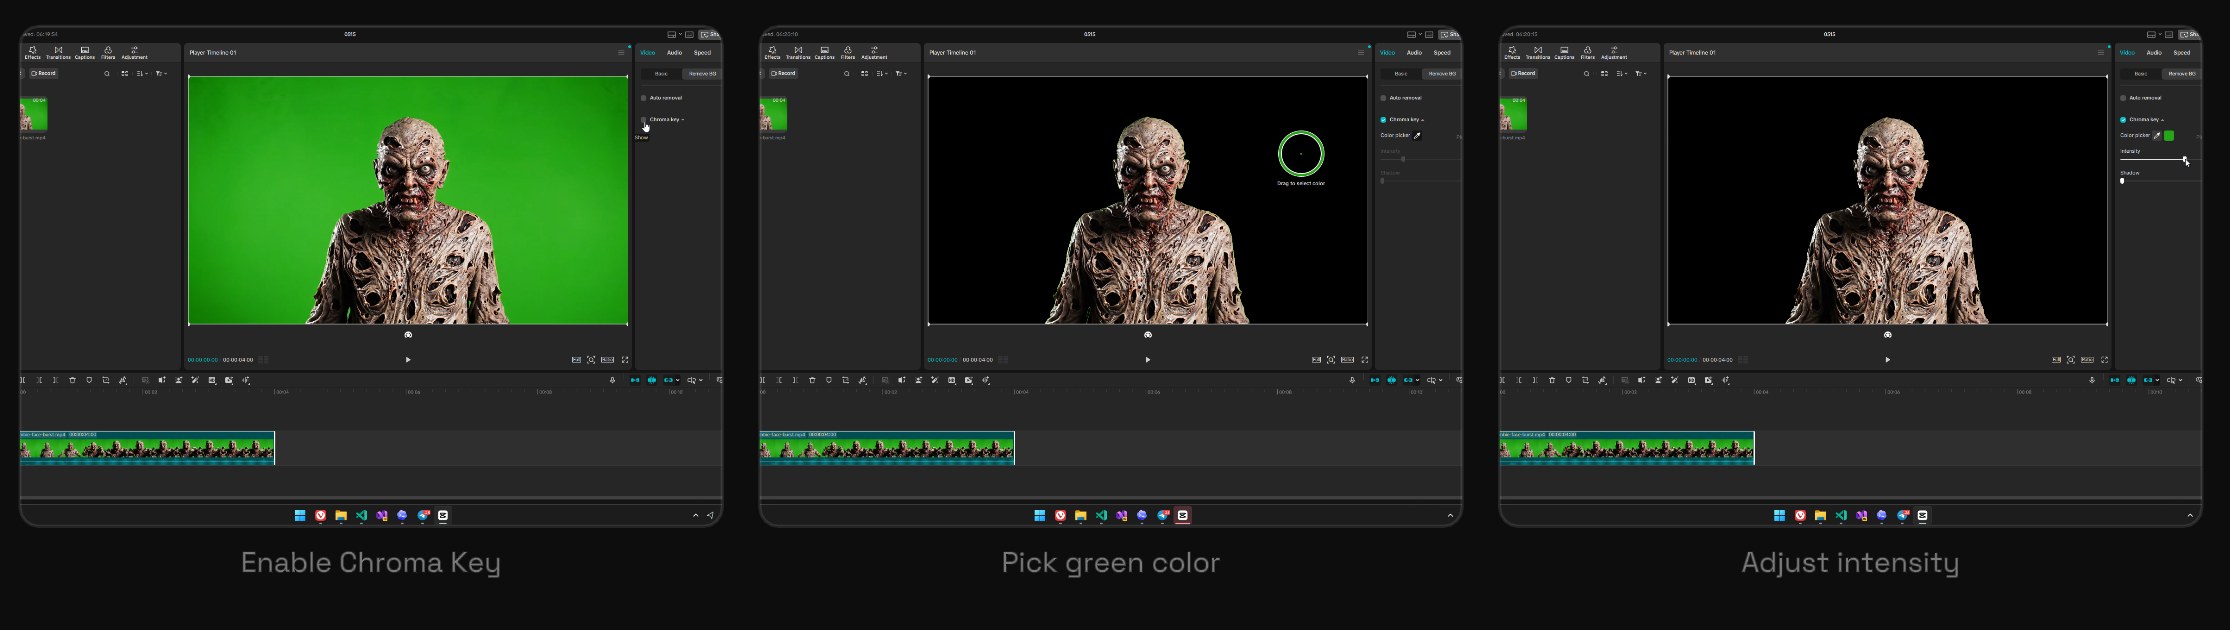
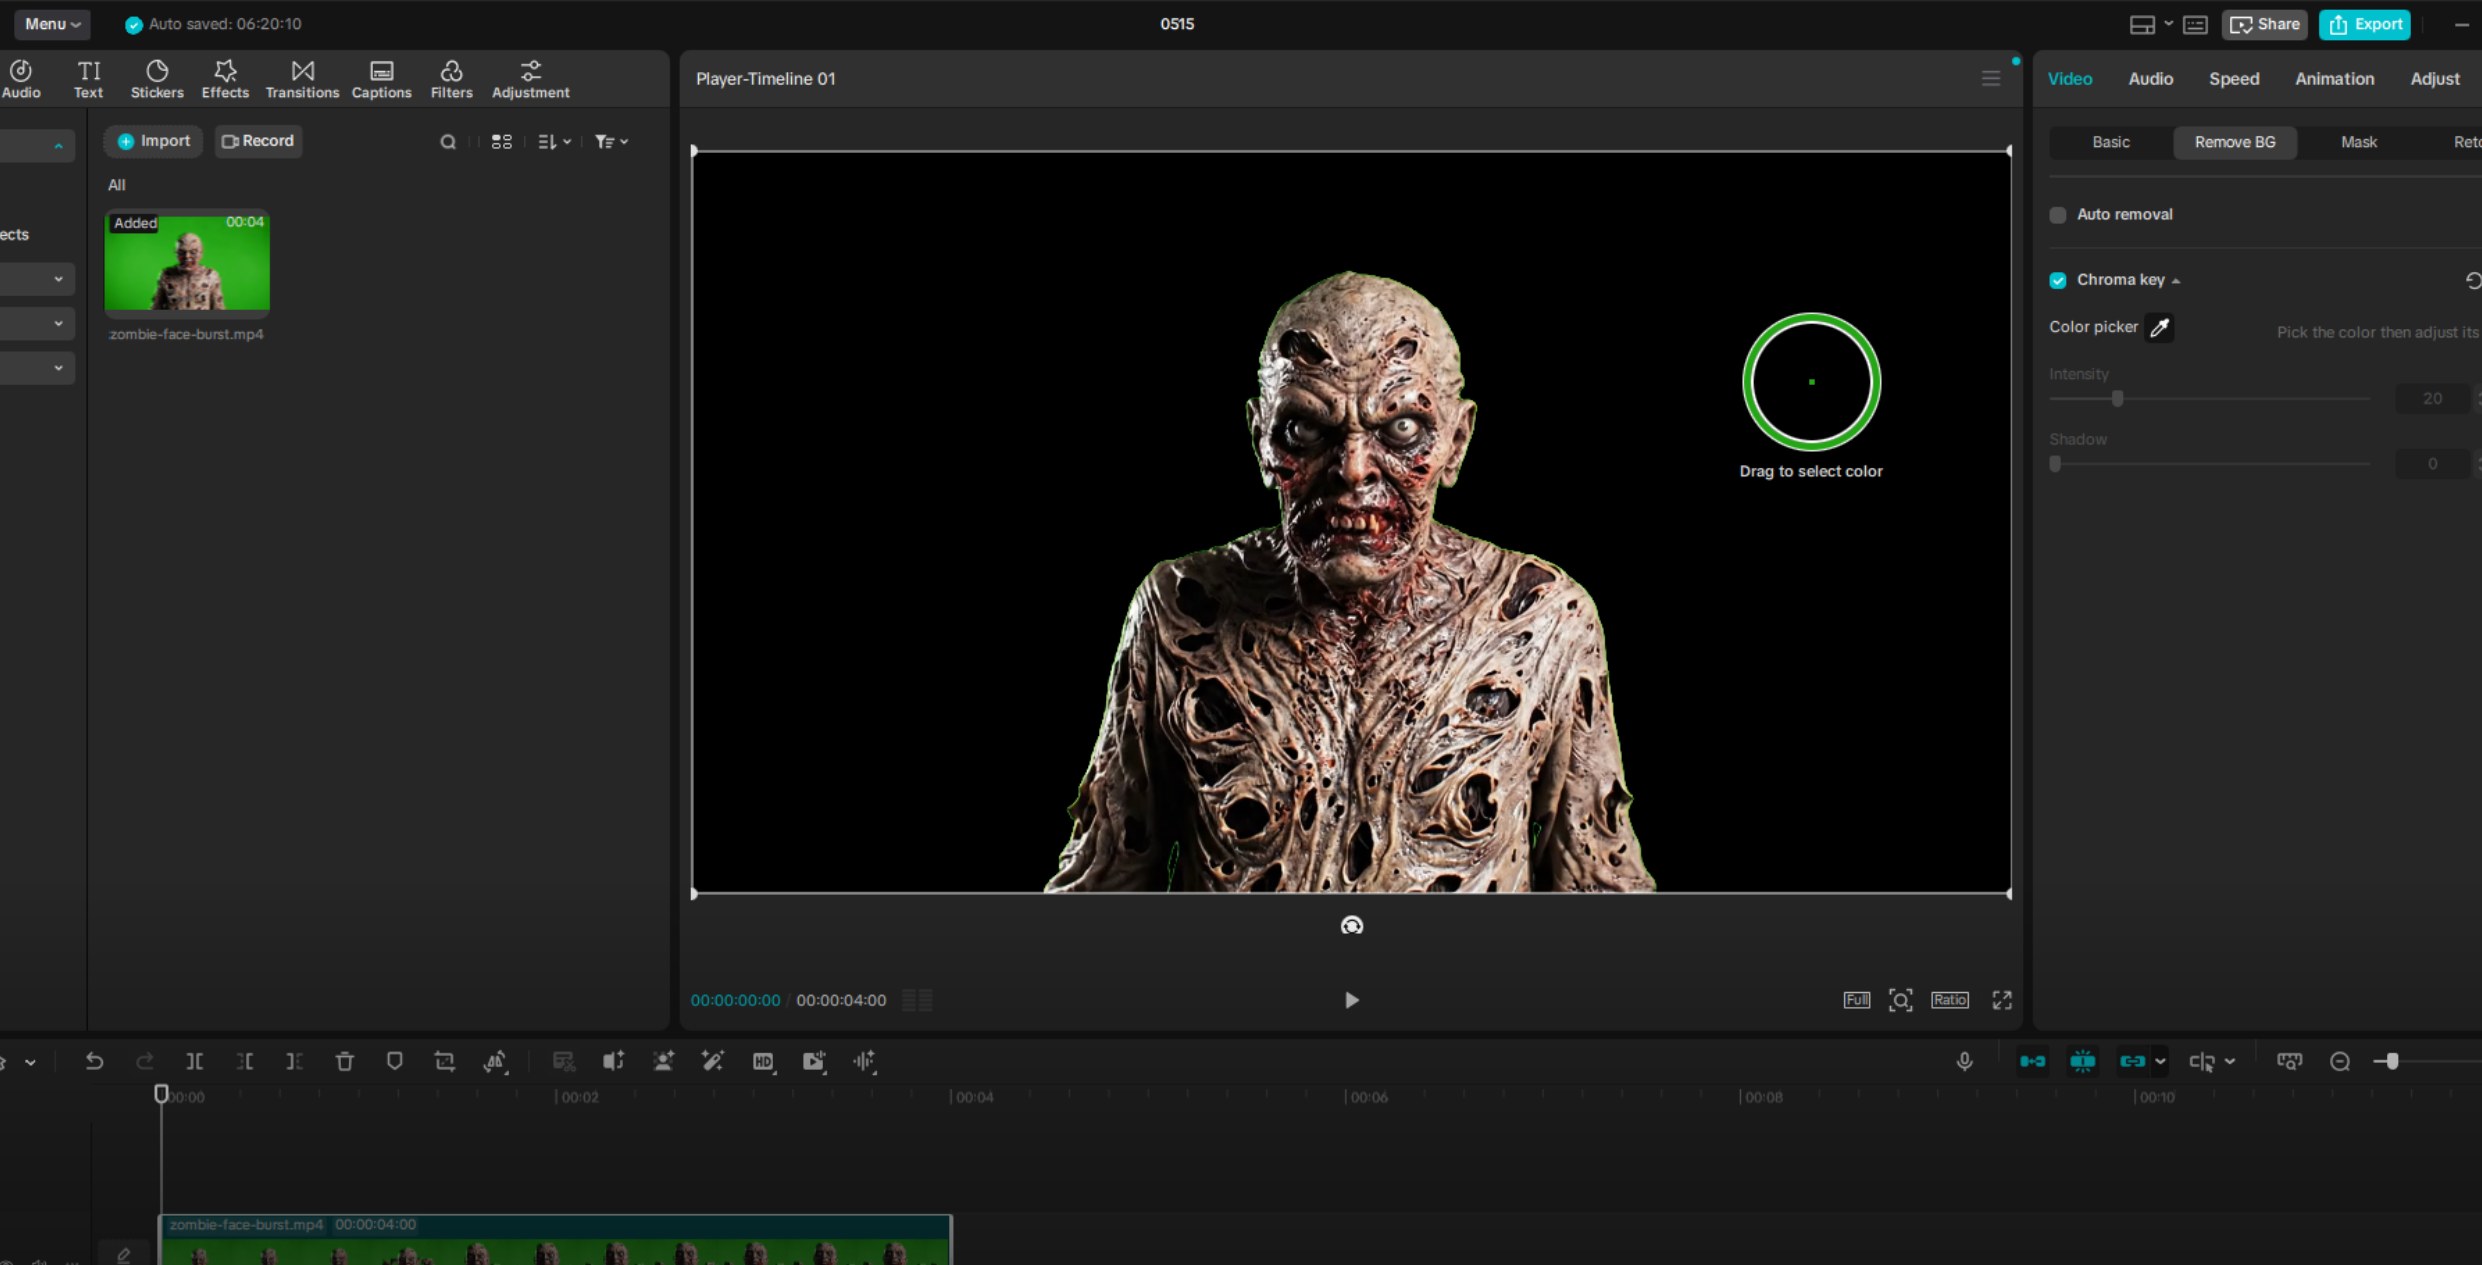
- Open CapCut and create a new project
- Import the generated video
- Drag the video to the timeline
- Select the clip
- In the right-side panel, go to Video
- Open Remove BG
- Enable Chroma key
- Use the color picker and click the green background
- Increase Intensity until the green background disappears
- Keep Shadow at 0 unless you specifically need to adjust it
- The green background disappears
- CapCut may show the removed background as black in preview — that's normal
- The subject should remain visible and have no holes
- There should be little or no green outline around the subject
- Increase Intensity
- Pick a different green area with the color picker
- Regenerate the source video with a cleaner flat green background
- Lower Intensity
- Avoid subjects that contain green colors
- Regenerate with a more separated subject and background
Export from CapCut with transparency
This step is important. A normal MP4 export usually does not preserve transparency, which is why we route through MOV + RLE first.
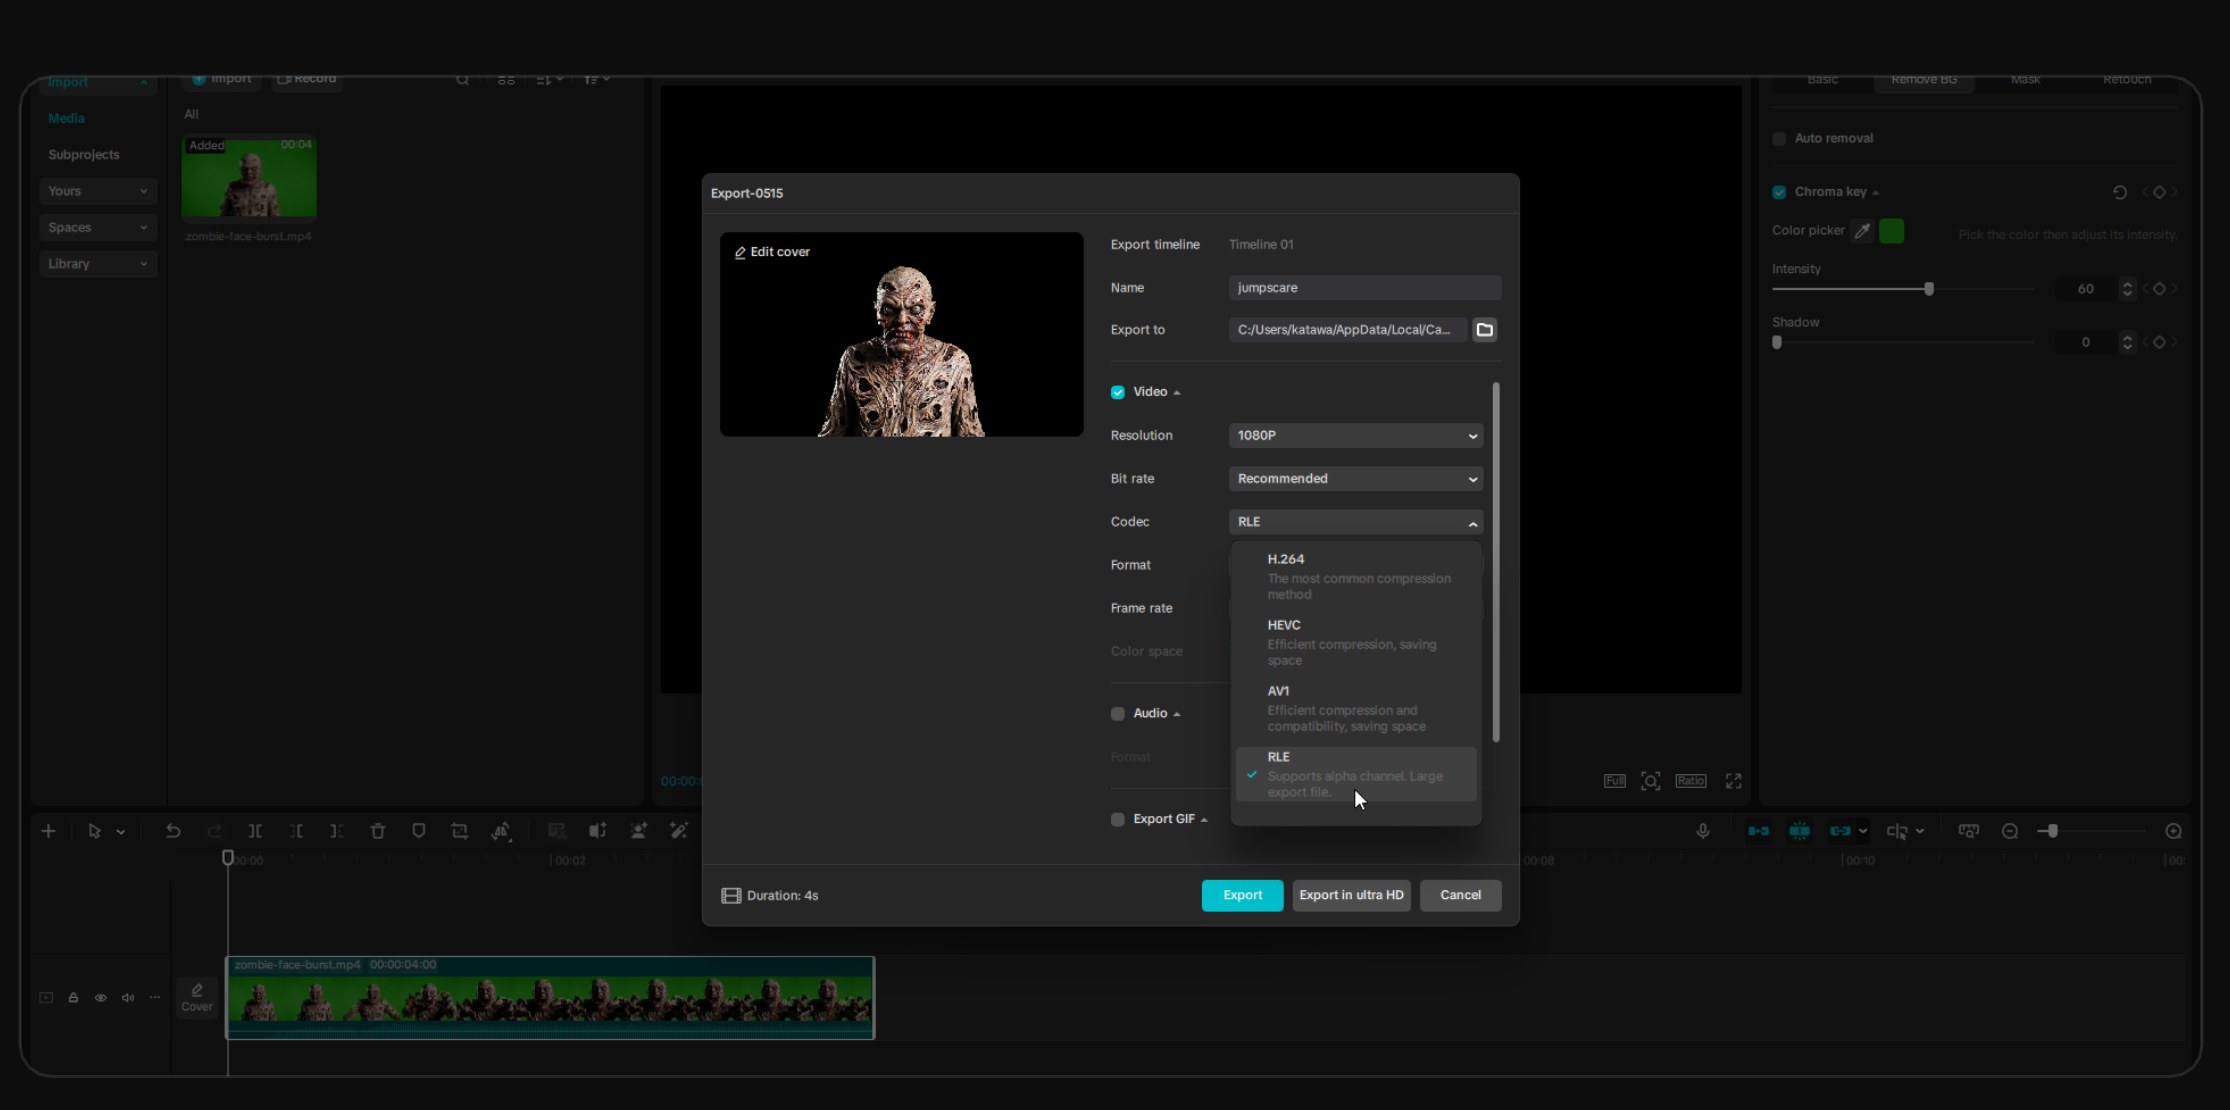
- Click Export
- Set a clear file name, e.g.
zombie-face-burst - Set resolution to 1080P or the source resolution
- Open the codec dropdown
- Choose RLE
- Make sure the export format is MOV
- Export the video
- It preserves the alpha channel (transparency)
- The file will be large — that's normal
- This file is only a temporary conversion file
Do NOT upload the MOV to Stream To Earn
Convert it to WebM first using CloudConvert (next step).
Convert MOV to WebM with CloudConvert
Open cloudconvert.com/mov-to-webm — that's the converter we use.
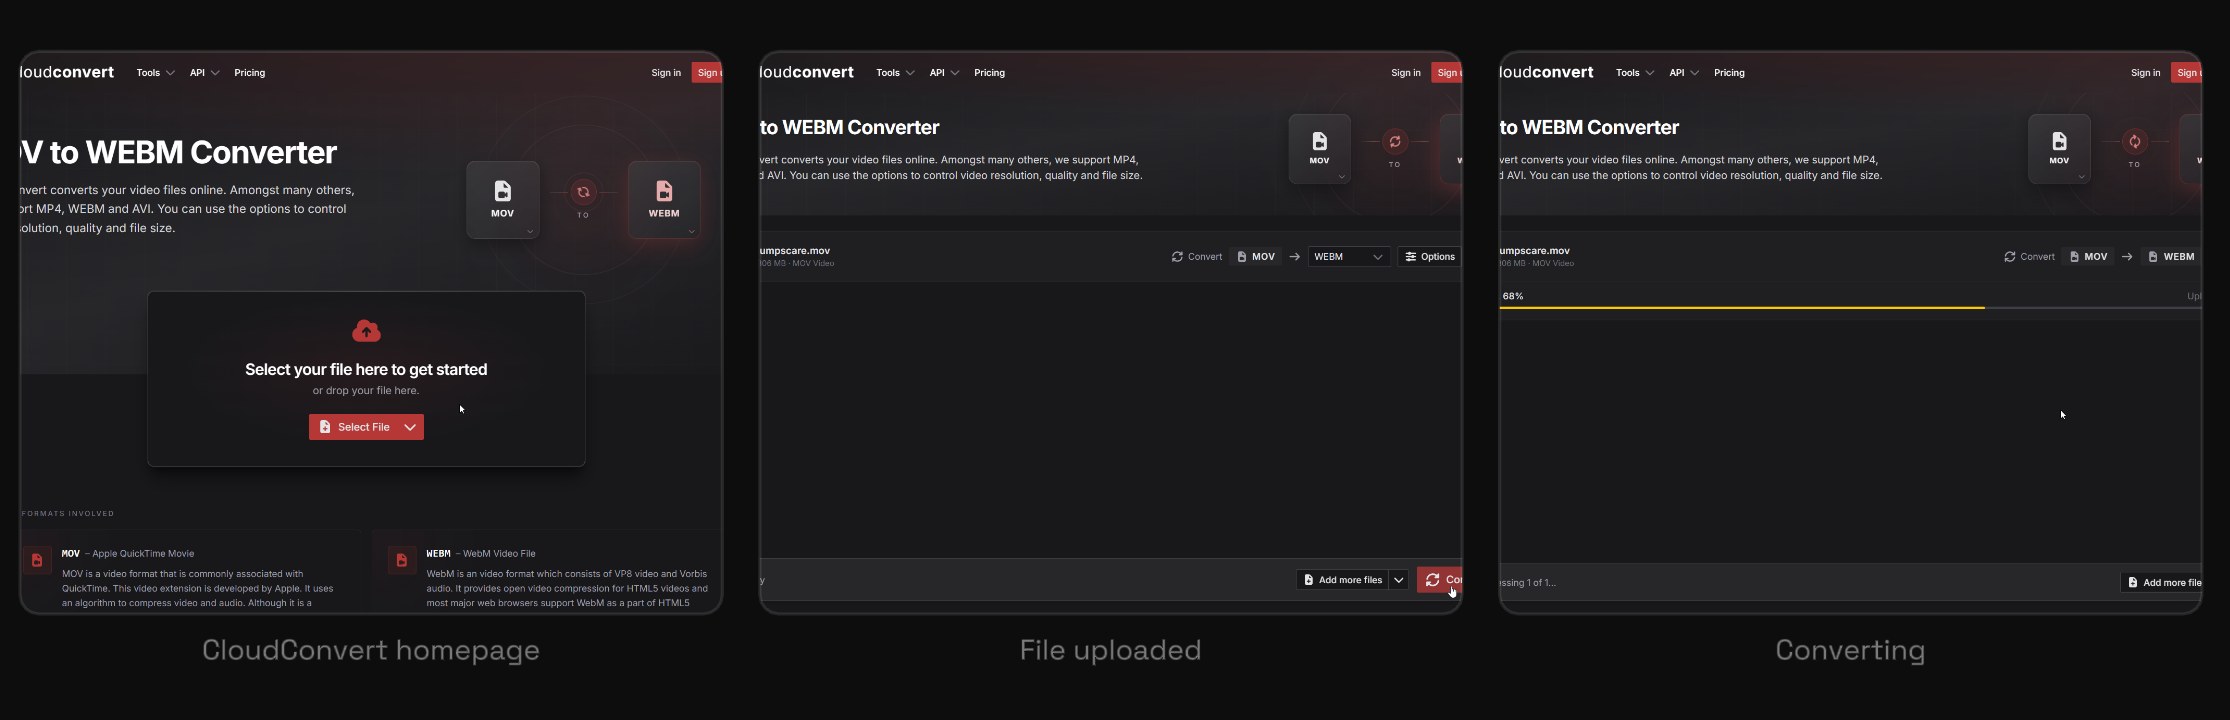
- Open cloudconvert.com/mov-to-webm
- Click Select File
- Choose the exported CapCut
.movfile - Confirm the page says MOV to WEBM
- Click Convert
- Wait for upload and processing
- Download the final
.webm
The final WebM file should be much smaller than the MOV. That's normal — WebM uses efficient compression.
After conversion, preview the WebM if possible. Check that the background is transparent and not a black or green rectangle.
Once the WebM is confirmed working, delete the large MOV. Keep only the final WebM unless you need to edit or reconvert later.
Upload to Stream To Earn
- Open Stream To Earn
- Go to the Alerts tab
- Upload the final
.webmvideo - Set it as a trigger
- Set the Screen parameter to Interrupt
- Save the alert
- Run a test trigger
- The alert appears over the stream / game
- The video interrupts the screen
- The background is transparent
- Audio from the WebM works (Stream To Earn supports audio inside uploaded overlay videos)
Recommended final asset
Common problems
Six things that go wrong most often, and how to fix each one. Click to expand.
Black rectangle behind the video+
Green background still visible+
Green outline around the subject+
Subject has missing parts+
MOV file is huge+
WebM has no audio+
Before you go live
Tick these off and you're done.
- Source video has a clean green background
- CapCut Chroma Key removed the green
- Export is MOV
- Codec is RLE
- Converted final file is WebM
- Final WebM has a transparent background
- Final WebM includes audio if needed
- Uploaded in Alerts
- Set as a trigger
- Screen is set to Interrupt
- Large MOV deleted after conversion